
DIY Floral Mobile for Nursery

DIY Project: SWEET BABY MOBILE
Step by step directions to creating your very own Ethereal Nursery Mobile. This was a larger project (space wise) than most of my paper projects so I it took up the whole kitchen table. Luckily, this is an easy peasy craft so you'll have your table back before the next mealtime.
You may remember we added a new bundle of joy to the fam earlier this summer. I created this mobile in hopes of adding a touch of fairytale whimsy to our pink and green nursery. Long story short- I'm still in love with the end result and had to share the beautiful tutorial.
Disclaimer: As an Amazon Associate I earn from qualifying purchases. This blog post contains affiliate links. I may earn a small commission to fund my calligraphy and caffeine habits if you use these links to make a purchase. You will not be charged extra, and you’ll keep me supplied in ink and caffeine. It’s a win for everyone, really.
Here's what you'll need:
Hot Glue Gun and Glue Sticks
7/8 inch Satin Ribbon (any color)
Assorted faux flowers and Greenery (I used mainly Pink Hydrangeas, White Roses and Purple Baby's Breath)
Ceiling hook
Here's how:

1.) Remove the tags from your flowers, greenery and craft ring and lay them out on your working surface.

2.) Remove flower buds and leaves from their stems. I left about a .25 inch of the stem remaining so certain blooms like the roses did not fall apart.
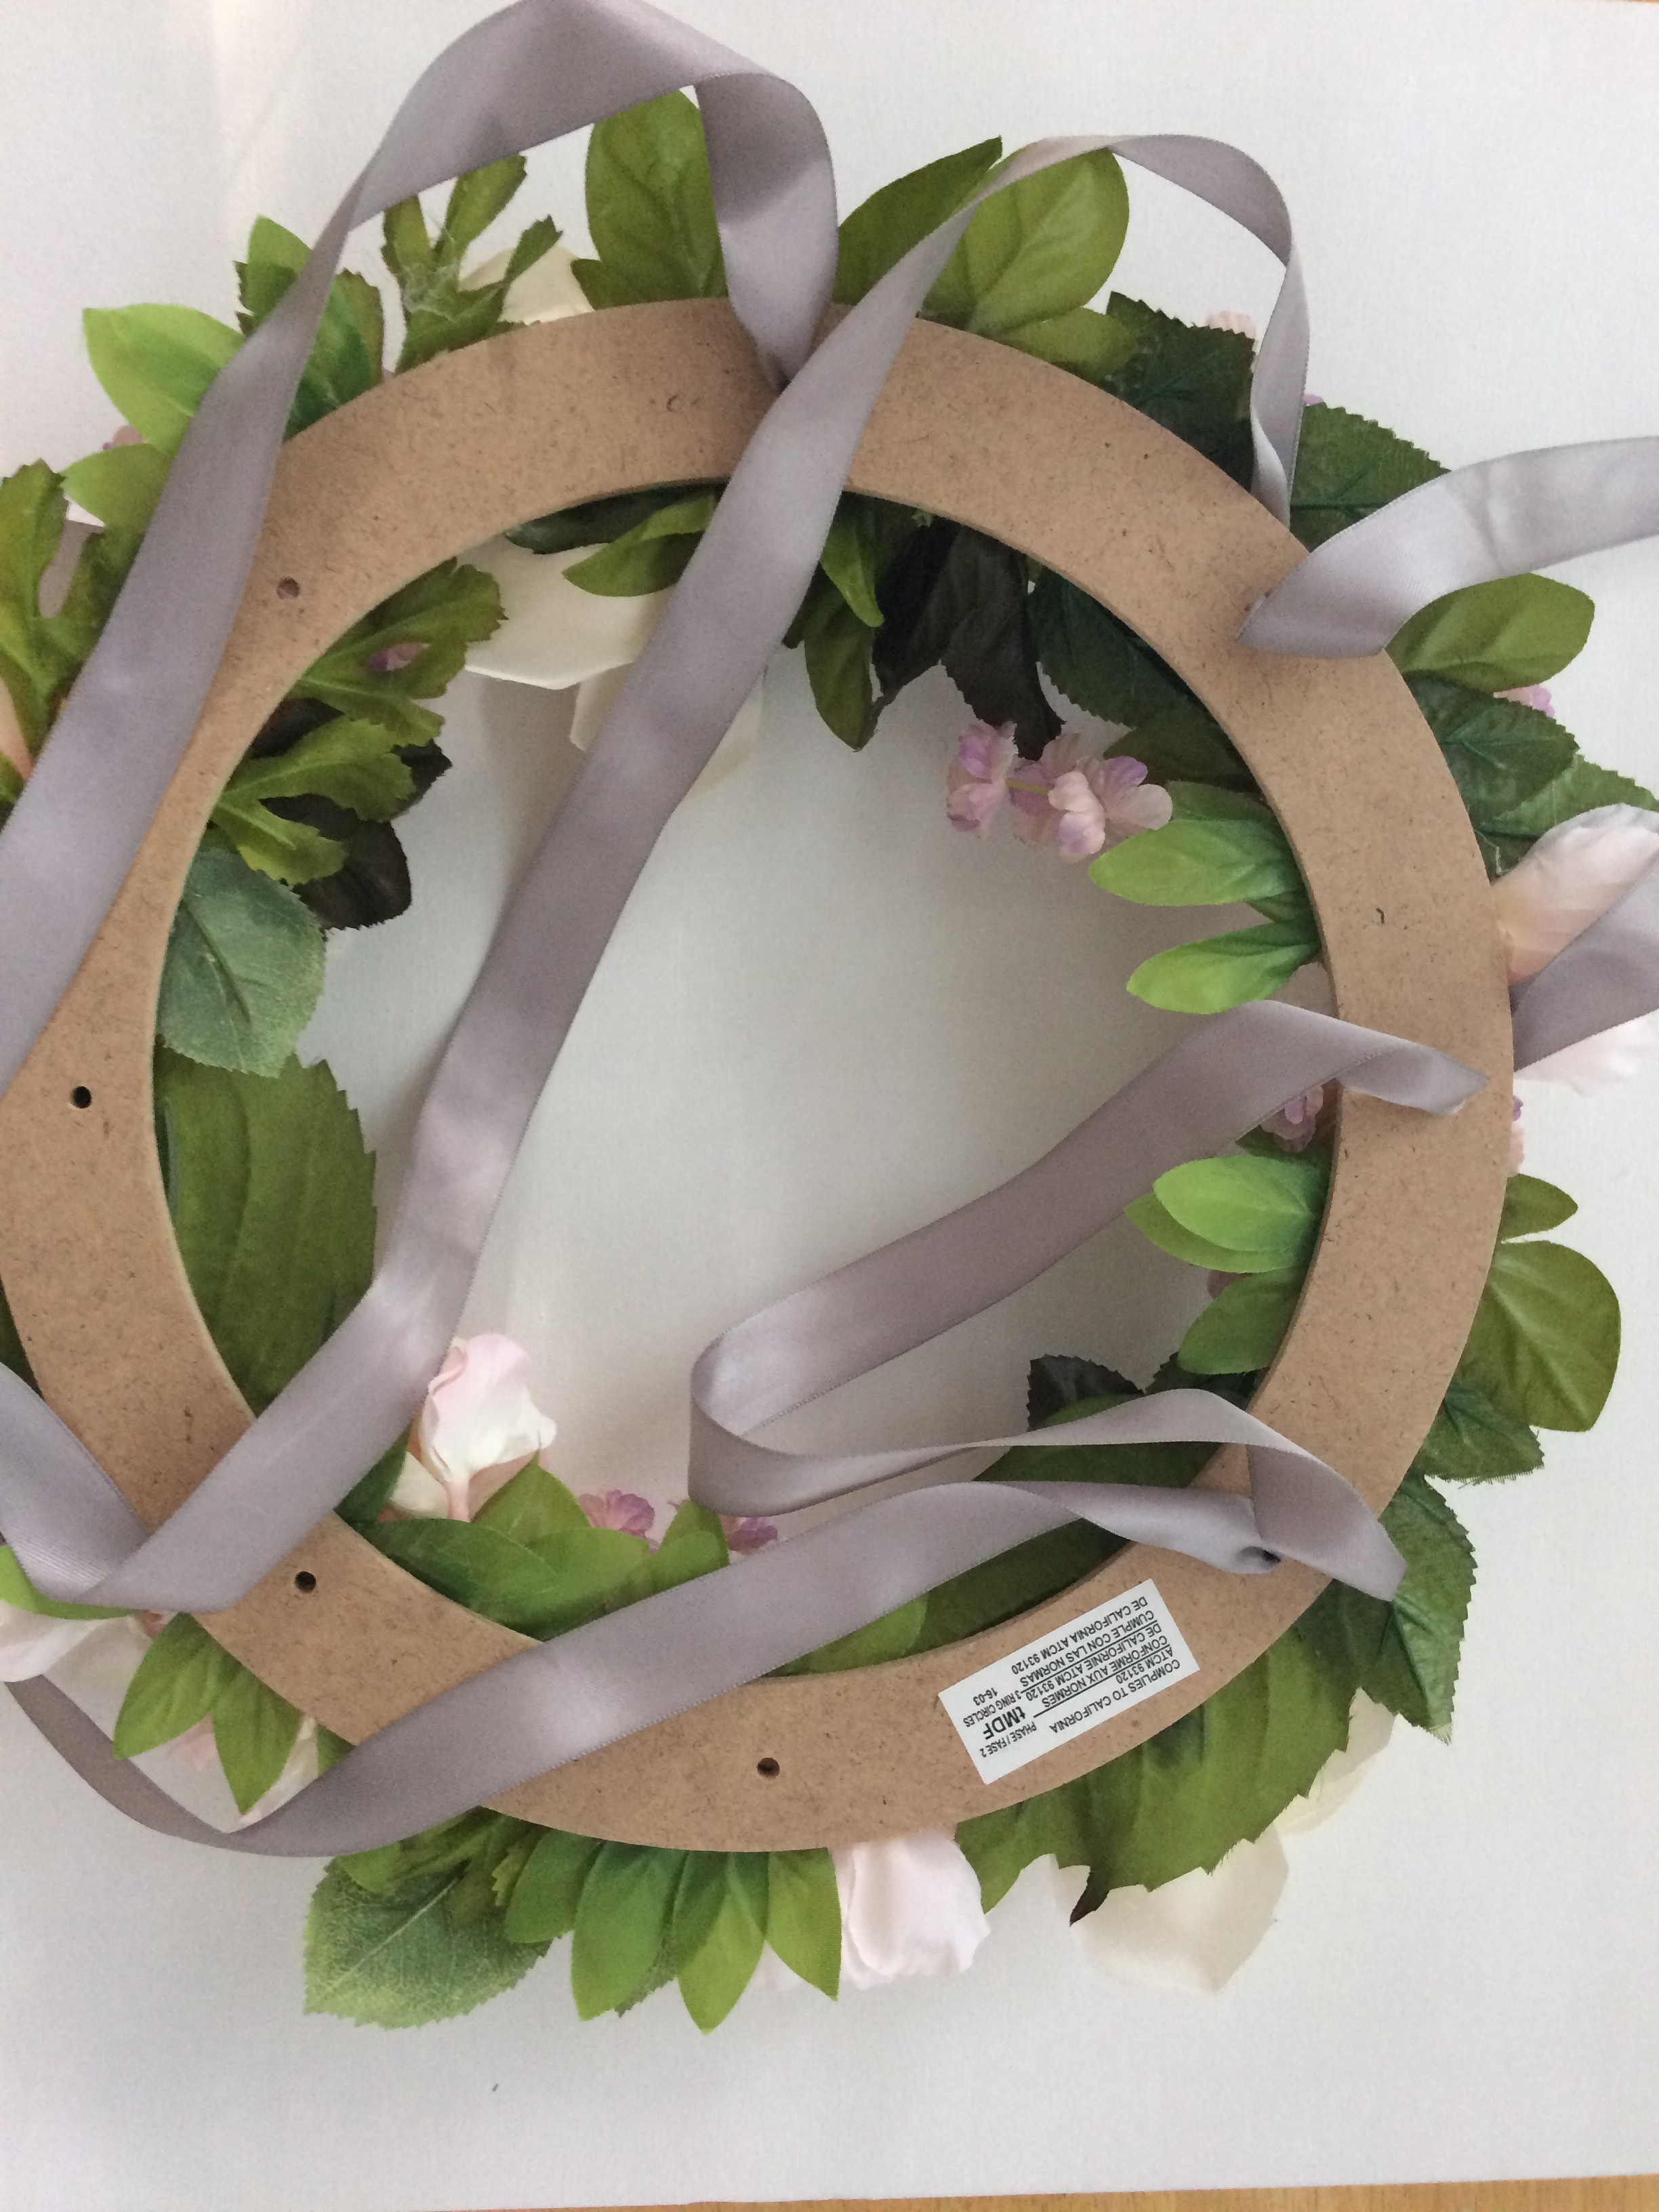
3.) Lace ribbon through the holes of the craft ring. You'll add a separate, long ribbon to the craft ring ribbon when you are ready to hang the finished mobile.. (It is much easier to lace the ribbon before gluing on the flowers. As you can see, I did it half way through and though I took care to avoid gluing over the holes it was still pretty tricky... and time consuming.)
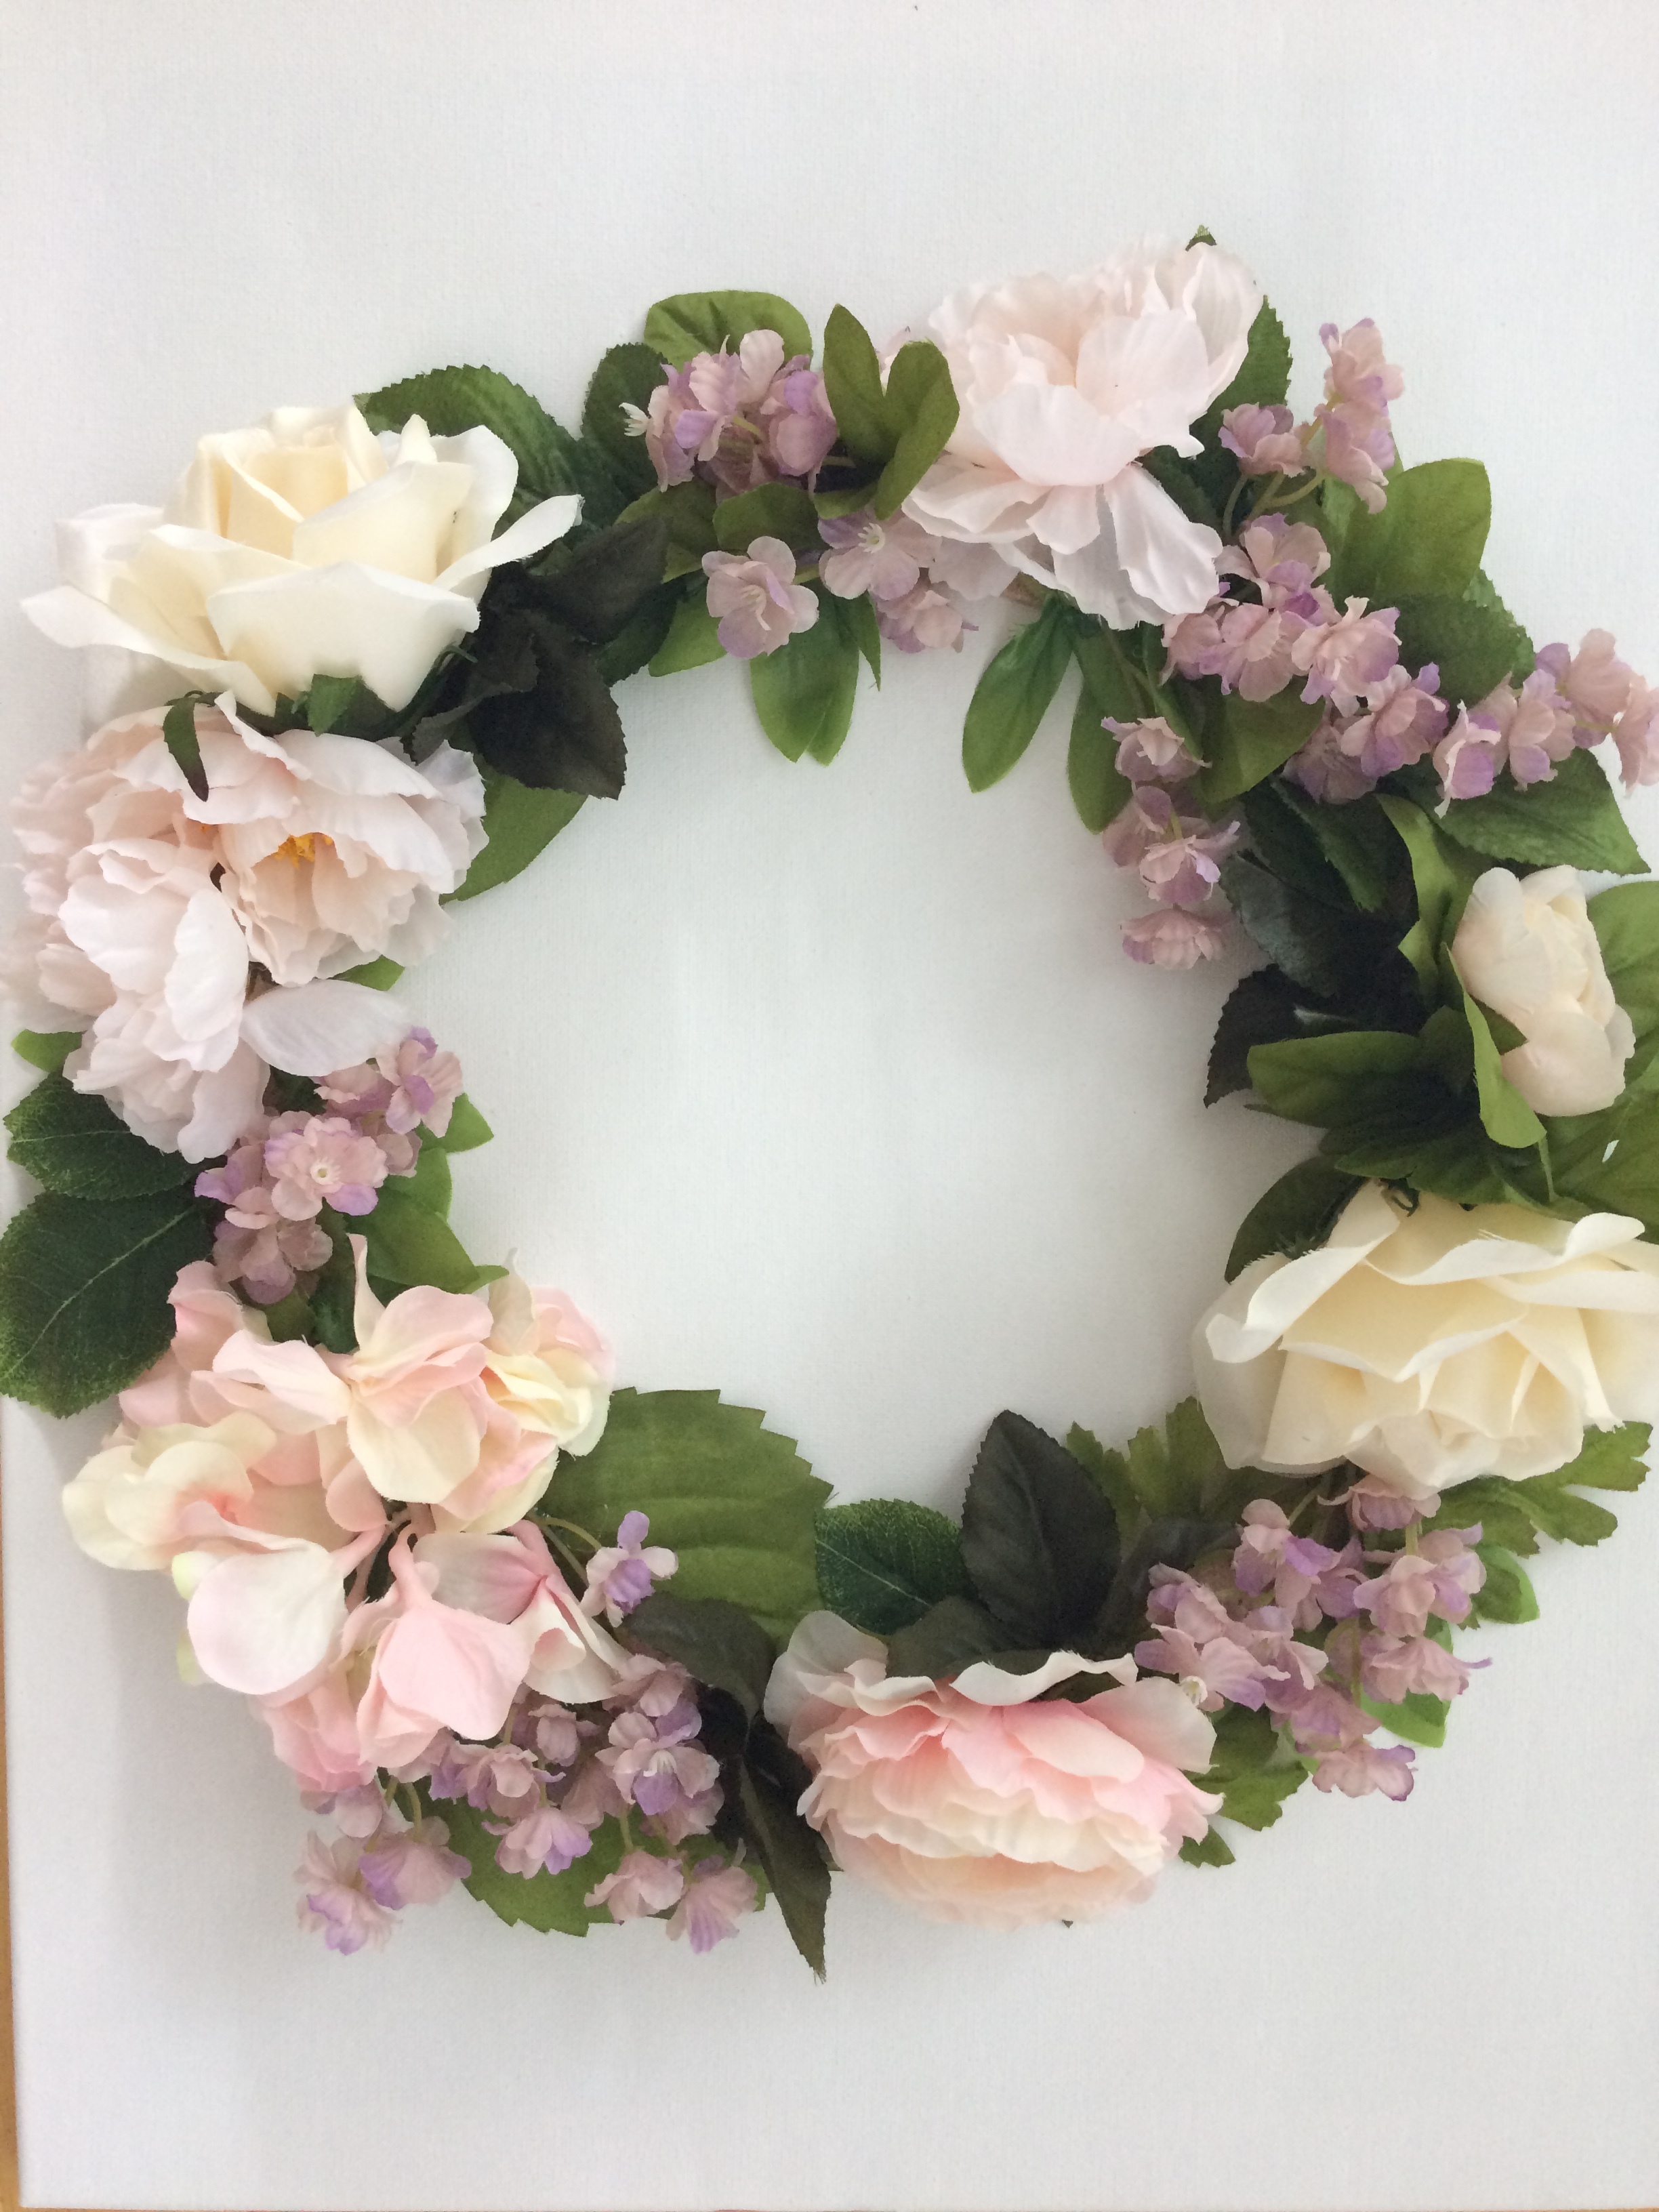
4.) Loosely arrange half of the flowers and leaves on the bottom of the craft ring. When your happy with the placement, gently move the flowers to the outside of the craft ring.
TIP: Use leaves as a filler to cover more of the craft ring and sprinkle in the flowers to get more coverage and depth.

5.) Heat glue gun and begin gluing flowers in place using care to avoid glueing flowers too near to the holes.

6.) Flip mobile over and repeat steps 4-5 on the top of the craft ring.

7.) DONE! Now you're ready to tie a long ribbon through the loops of ribbon on the mobile and hang.
GOOD LUCK! If you make this mobile we'd LOVE to see! Leave a picture in the comments or tag pictures with @RaleighCalligraphy

Our Helm Planner helps you destress + hustle less.
A life planner designed to bring you less stress and more happiness.
